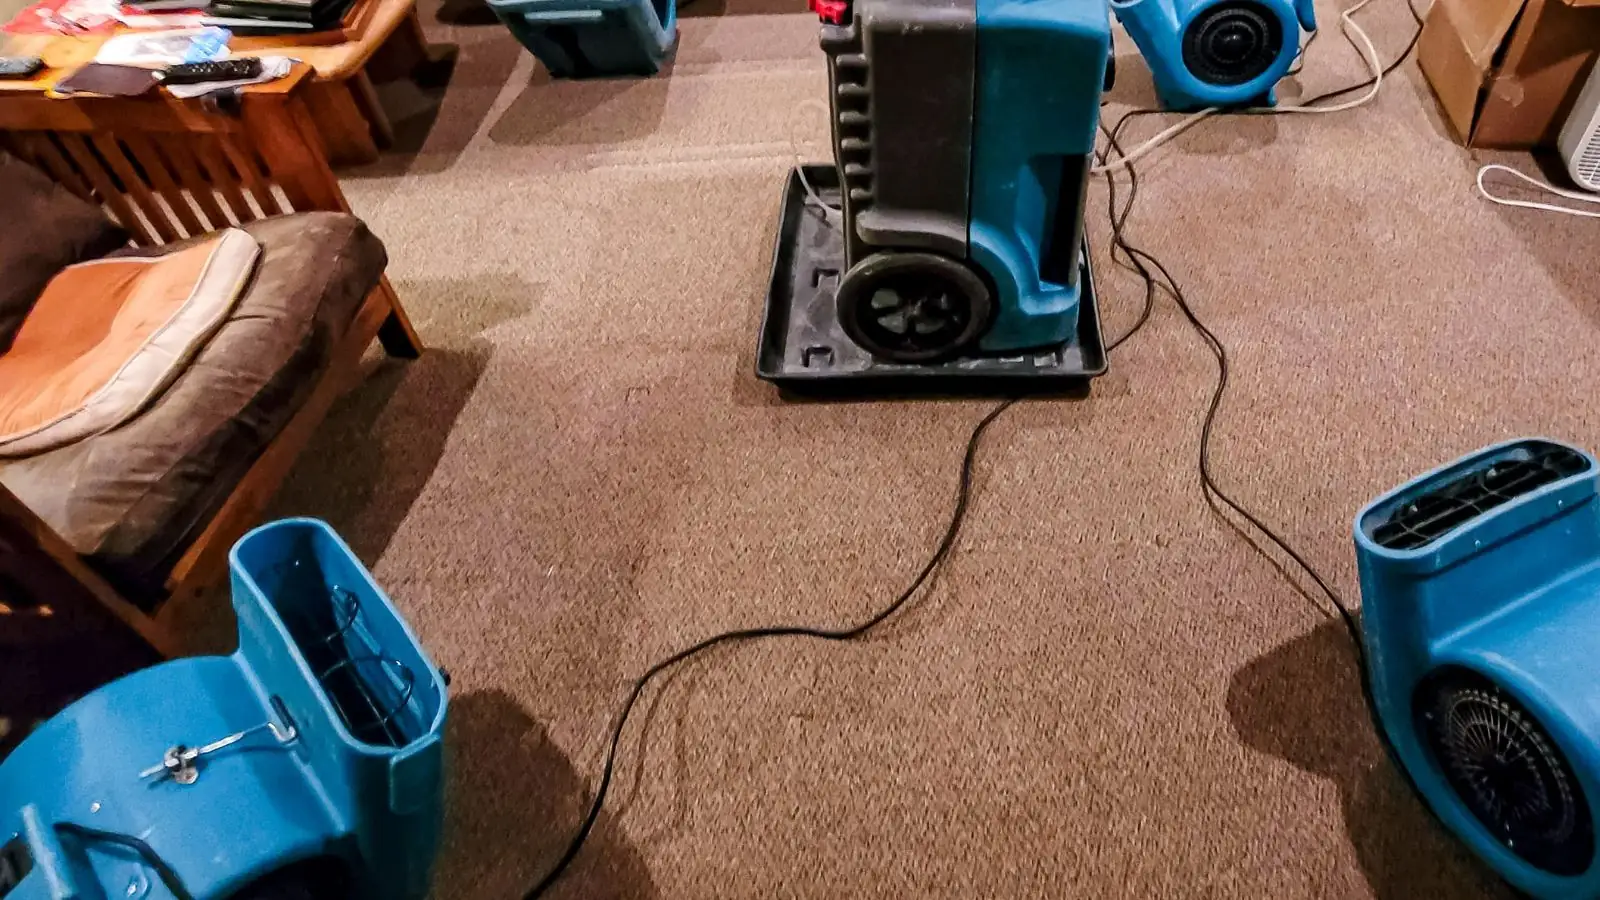
Structural drying removes water from the walls, floors, ceilings and framing of a building after a leak or flood. A crew maps where the moisture is, sets up air movers and dehumidifiers in a controlled space, checks readings every day, and stops only when wet materials match a dry reference. It is typically a few days, but that depends on materials and conditions.
The process matters because surface dry is not the same as dry. Water hides inside drywall, insulation and framing where you cannot see it, and it can keep damaging a home long after the puddles are gone.
Stage 1: Moisture mapping and baseline readings
Everything starts with finding the water. The crew uses a moisture meter to read walls, floors and trim, and often a thermal camera to spot cool, wet areas behind surfaces. They mark the edges of the wet zone so the drying plan has a clear boundary.
They also take baseline readings from dry, unaffected material of the same type in your home. That dry reading becomes the goal. A wet wall is only called dry when it matches the dry wall.
This is the first step of water mitigation, which is the work done in the first 24 to 72 hours to stop damage from spreading. The industry standard for this work is ANSI/IICRC S500, and you can ask any company whether its crews work to it.
Stage 2: Extraction and removing what cannot be saved
Standing water goes first, because equipment dries air and surfaces far more slowly than a pump or extractor removes bulk water. Wet carpet pad and some soaked materials are usually pulled out early. Drywall and insulation that stayed wet are often removed rather than dried, and the decision depends on the water category and how long materials were wet.
If the water was contaminated, the crew handles that first through water damage cleanup. Removing debris and contaminated materials, then sanitizing, comes before drying equipment goes in. It keeps dirty water from being dried into the building.
Need help with this today?
Dispatch is open 24 hours a day, every day.
Stage 3: Containment and zone setup
Drying works best in a closed space. The crew uses plastic sheeting and tape to seal off the wet zone, so the equipment dries that area and not the whole house. It also keeps dust and moisture from spreading to dry rooms.
Zones can be small, such as one wall cavity, or large, such as a whole floor. In some jobs the crew adds a negative air setup, so air flows into the wet area and not out of it. That is common when demolition kicks up dust.
Stage 4: Placing the equipment
Air movers push dry air across wet surfaces and into cavities. LGR dehumidifiers pull the moisture out of the air and drain it away. Together they create a steady loop: wet material gives up water to the air, and the dehumidifier removes it.
| Equipment | What it does | Why it is there |
|---|---|---|
| Moisture meter | Reads moisture in wood, drywall and concrete | Finds hidden water and sets the goal reading |
| Thermal camera | Shows temperature differences on surfaces | Points to wet areas behind walls and ceilings |
| Air movers | Blow air across surfaces and into cavities | Speed up evaporation from wet materials |
| LGR dehumidifiers | Pull water vapor out of the air | Keep humidity low so materials can keep drying |
| Air scrubbers with HEPA filtration | Filter dust and particles from the air | Clean the air during demolition or in contaminated jobs |
| Containment barriers | Seal off the wet zone with plastic | Focus drying on the wet area and stop spread |
Placement is not random. Air movers are angled along walls and spaced out by the crew based on wet area size. Moving them changes the drying pattern, so leave them where they are.
Stage 5: Daily monitoring
A crew returns each day to take readings at the same spots. Numbers should fall over time, and if they do not, the equipment gets adjusted. They also check temperature and humidity in the room and may move or add equipment.
This is where drying often succeeds or fails. A job that is set up and left alone can stall. Daily checks catch pockets of water that were missed and keep the drying on track.
Why you cannot just open the windows
Opening windows can help in a dry, warm climate, but the Puget Sound area in winter is neither. Outdoor air is often humid, so fresh air can add moisture to the room instead of removing it. A dehumidifier in a closed space controls the air in a way open windows cannot.
Heat helps drying, but it has to come with moisture removal. Without a dehumidifier, warm wet air simply condenses on cool surfaces. The closed system keeps that from happening.
What you do while the equipment runs
Keep equipment running
Do not unplug air movers or dehumidifiers to save power or quiet the house. Stopping early can leave wet material behind.
Leave placement alone
If a machine is in your way, ask the crew to move it. A shifted fan can leave a wet spot untouched.
Expect noise and electric use
The equipment is loud and draws power around the clock. Plan for a noisy few days, and ask your electric utility how it may affect your bill.
Keep the zone closed
Keep doors shut and plastic in place. Keep children and pets out of the contained area.
When drying stops and what to keep for the insurer
Drying is done when readings on affected material match the dry reference and stay there. Then the equipment is removed. After that, repairs begin, which is the work in water damage repair.
Ask the crew for daily logs, moisture readings, photos and equipment records. Insurers have a contractual right to inspect, so ask your insurer when it can send someone, and make the property available promptly. Keep small samples of any damaged materials you discard. Sudden and accidental damage is often covered, and gradual leaks often are not, so check your policy.
Safety steps during structural drying
- Keep cords and power strips for the drying equipment out of any standing water.
- Do not turn off or move air movers and dehumidifiers, because a stopped machine slows the whole job.
- Keep children and pets away from running equipment and hoses.
- Report any new smell, stain or soft spot to the crew so they can recheck the readings.
We serve Mukilteo and nearby towns, with crews that cover homes in Edmonds and in Lynnwood as well. To start, call (425) 592-3399. Scope and price explained before work starts.
Mukilteo local note: damp winters and who supplies the power
Mukilteo has mild, rainy winters and dry summers, so for months outdoor air carries a lot of moisture. That is why a dehumidifier does better than a fan and an open window, and it is why crews keep the wet area closed off.
According to the City of Mukilteo's utilities page, electric service comes from Snohomish County PUD. Drying equipment runs for days, so your usage will go up, and electricity costs vary. Ask the PUD how a few days of added load may show up on your bill.
Frequently asked questions
Typically a few days, but it depends on materials and conditions. Dense materials like hardwood and concrete dry slower than drywall. The crew checks readings daily and stops when wet material matches the dry reference.
Air movers and dehumidifiers move a lot of air to pull water out of materials. The noise is a sign the system is working. Ask your crew about quieter placement if it bothers you.
Please do not. Drying works around the clock, and stopping lets moisture settle back into materials. If the noise is a problem, talk to the crew.
Mold needs moisture, so drying quickly helps limit it. EPA advises drying water-damaged areas within 24 to 48 hours. If mold is already visible, testing and remediation follow ANSI/IICRC S520, and health questions belong to a physician.
Yes, it likely will, since the equipment runs for days. Snohomish County PUD supplies electricity in Mukilteo, and costs vary. Ask the PUD about your account.
Ask for the moisture readings. The numbers on the wet material should match your dry reference reading, and the crew should show you the daily log.
Still have a question? Call (425) 592-3399, any hour.